In the final part of our Superman Returns coverage, Bill Desowitz reports on the challenges and accomplishments met by several participating vfx studios.

Shake is an advanced compositing tool that was originally designed to cater to the film world. Look up the Academy Award winning movies in visual effects over the last several years and they have all used Shake in some capacity. In this latest release, Shake 4.1, Apple has opened the floodgates to every user by lowering the price to $499. In addition to the new aggressive price point, the release is a Universal Binary, which means it will run natively on the Intel Macs as well as the PowerPC.
Buying Shake is almost a no-brainer at the new price. Users that have not needed the entire package, but wanted to use Shake for some of the individual functions such as keying or motion stabilization can now buy Shake for a price in line with what many plug-ins cost.
The Greatest Change of All
Although you wont see a difference, you will most certainly feel a difference in performance. For this review, I ran Shake on a 17" MacBook Pro with 2GB of RAM and a 120GB hard disk. The performance increase when compared to a 1.67GHz Powerbook is remarkable. The bigger surprise is how Shake performs on the MacBook Pro when compared to a desktop Mac. The performance is on par with all but the fastest PowerMac (Quad 2.5GHz). Shake is not a real-time program. It works using accelerated frame playback within the in main interface or previews can be sent to disk or RAM for realtime previewing.
When you first launch Shake you wont notice any change at all. The interface and keystrokes remain almost the same. There are some minor changes that remap the F1-F4 keys to save functions instead of rotoscope control. Other changes include improvements to the Motion blur performance and proper display of the onscreen scale controls from all angles. There are a number of general enhancements that I found helpful:
-
Shift-F in the Curve Editor now frames all selected points.
-
When using the Send to Shake command from Final Cut Pro, the RetimeMotion node now works properly when using the Blend or Adapter modes.
-
Zooming sensitivity using the +(plus) and -(minus) keys has been adjusted.
-
Inverted OpenEXR files are now properly read and displayed.
- Shake now properly displays Photoshop PSD files that have been exported with alpha channels.
Getting Started with Shake
The first time I launched Shake I felt like someone who had only driven a car and was being the task of flying an airplane. I knew what Shake was supposed to be able to allow me to do, I just didnt know how to do it. My experience had been with timeline based editing and motion graphics programs such as Final Cut Pro and After Effects. Fortunately, once I began to work with Shake I found I preferred a Node based compositing workflow to traditional timeline/layering tools. There is a timeline in Shake that can be used for basic timing functions. If you give Shake a chance you will find you will be flying in that Node based environment in no time.
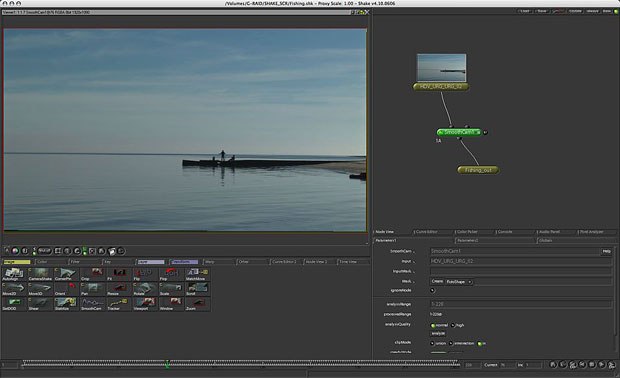
The Shake interface is divided into four quadrants; The Viewer area, The Node View, The Tools Tabs and the Preferences Tabs. The quadrants are resizable by simply dragging the intersecting lines between two or more of the quadrants. In Shake you do not have to activate any of the quadrants to use quadrant specific keyboard shortcuts. Instead, place your cursor over any of the quadrants and any keystrokes are applied to that quadrant. A cool keystroke to use to maximize a quadrant to full screen, is to simply position your cursor over a quadrant and press the spacebar, press the spacebar a second time to return to the quadrant view. It took a bit of getting used to as my instinct is to use the spacebar for playback (as in most timeline based programs).
Viewing Images
The Viewer displays the content of one or more Viewers. You have total control over the content of the Viewer. This includes the ability to change the view to an individual channel using simple keystrokes. Press R for the red channel, press G for the green channel, press B for the blue channel, press A for the Alpha channel and finally press C to view the combined R,G and B channels.
Color Me Floating Point
In Shake you can choose to calculate your work in 8-bit, 16-bit or float. You can choose the color space on a node-by-node basis. The ability to work in float is a must in film work, 16-bit should suffice for most television broadcast work. Working in a higher color space comes with a performance hit, but it is well worth the exchange for the increased quality in your compositing.
I have been using Shake for quite some time for single still image processing. The powerful color operators in conjunction with the float point capabilities allow for much more detailed control of color and composting then even Adobe Photoshop which is limited to 8-bit for many of its operations.

Working in the Node View
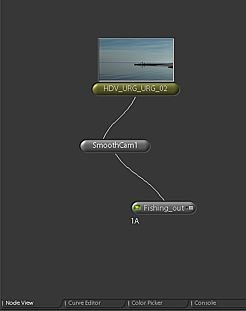
The Node View is a schematic like view of your work. Files and operations including blends, blurs and transformations are represented as nodes. This schematic view is often referred to as a process tree. Operations flow down the process tree and eventually an output node can be added to create a file. Nodes are interconnected using noodles, which connect to the knots. The function and number of knots on a node depend on the node itself. A node can be loaded into a viewer clicking on the left side of the node.
Clicking on the right side of the node loads a nodes parameters into the lower right parameter quadrant of the interface. Double-clicking a node performs double duty, it loads the node in the viewer and activates the parameters at the same time.
The power of the node view is multifaceted. An output node can be placed at any point in the process tree to send a file out. You can adjust the parameters of one node while viewing the affects the changes have to another node. An input node containing a file can be used multiple times without duplication. An oft-used technique is to screen an image over itself and apply a blur to the screen resulting in an image with glowing highlights. When this is done in a timeline-based program, the image must be duplicated. In Shake the technique would appear as illustrated below.

Shake In, Shake Out
Shake works with a variety of formats including files formats that can be read by QuickTime, Cineon files and OpenEXR. It shares its native .iff format with Maya. Imported video files can be retimed, deinterlaced and even re-sized with unbelievable results due to Shakes Optical Flow technology which goes far beyond the typical averaging of frames used in other applications.
Output rendering can be accelerated using distributed rendering controlled by Apples Qmaster. A cluster of networked Macs or a dedicated cluster of Xserves can pump out frames of not only Shake files but also Compressors Batch processes. The distributed rendering software can be run for free on any Mac. Distributed rendering on Linux is available, but will cost you. Check with your local Apple Pro reseller for pricing on the Linux versions.
Final Cut Pro Studio Integration
Apple has created a clever workflow allowing you to send files or groups of files directly from a Final Cut Pro Sequence to Shake. The process is pretty straightforward. Select the file(s) you want to send from your Final Cut Pro Sequence. Right-Click on the selection and choose Send To >Shake. In the resulting dialogue box enter a name for the newly created Sequence (the new Sequence will be nested in a track above the current selection in Final Cut), a name and location for the newly created Shake script and a name and location for the resulting File Out Node.
Click on the checkbox to automatically launch Shake. The contents of the newly created Sequence are tied to the File Out node coming from the Shake scripts. Details such as the input File Format and output File Format are automatically handled.
Animating Motion graphics and controlling particles are items that Apples Motion does quite well. Shake can import a Motion project directly. In earlier versions of Shake it was necessary to change the extension of the Motion project from its native .motn to .mov in order to import projects. In the current version of Shake, import a Motion project directly without changing the extension.
The Toolset
All of the operators you can apply in Shake are housed Tool Tab area. The area contains a series of Tabs based on function. There are additional Tabs on right edge that include a second Node View a second Curve Editor view and a Time View (timeline).
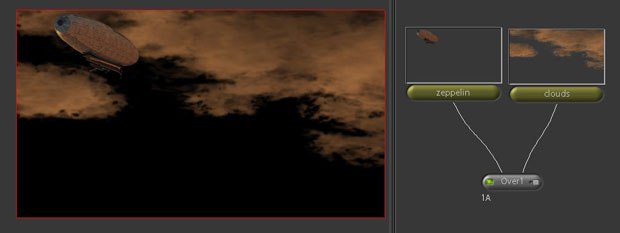
One of the more common nodes used in compositing is the Over node which can be found in the Layer Tab. To build a simple composite import your foreground and background images using the FileIn Node (Image Tab). Select the foreground image and click on the Over operator. A noodle appears attaching the foreground image to the newly created Over node. Next drag a noodle out from the bottom know of the background image and attach the noodle to the upper right know of the Over node. The Over node expects a premultiplied Alpha channel. If the foreground is not premultiplied simply toggle off preMultiply in the parameters for the Over node.
Additional Operators
Shake ships with a number of practical operators for blending and adjusting composites. These include options for automated painting and rotoscoping of images or image masks. There are a series of color control operators including the ability to translate Cineon files to a monitor color space and a Truelight plugin that can simulate film projection characteristics. Shake includes a terrific Film grain operator that can simulate grain from an existing plate. Keying is one of Shakes strengths, both Primatte and CFC Keylight 32-bit keyers are included to get you started. Introduced with Shake 4.0 is a Multiplane compositing operator that works in a multiplane space using 3D camera controls. The Transform operators include various tracking and stabilization operators including the Smoothcam operator which can stabilize shots by analyzing images without adding control points. There is also a Morpher and Warper operator for creating transformation effects.
Time to Buy?
Those already using Shake will appreciate the new price, which will allow them to add more seats to their facilities. The new price is lower then any previous upgrade of the software.
New users, who have wanted to use portions of Shake, can now justify the purchase, even if they are simply using Shake for keying, motion stabilization or one of the other specific functions within Shake.
Apple deserves props for the aggressive new price change and the increase in performance, especially on the Intel chips.
Orlando Luna owns and operates Luna Studio a production company in Miami, FL. He is an Apple Certified Trainer and a co-author with Ben Long of the Apple Training Series: Aperture Book on Peachpit press.


