Character rigging master Brad Clark returns once again to put the latest Autodesk software suite update to the test.
Flexible subscriptions, real time animation and procedural creation are the name of the 2016 game.
First up, let’s address the big change from Autodesk - the new licensing model. Subscription based licensing is soon to be the only choice when you want Maya - with options of Monthly *$185 SRP† (Online store only), Quarterly *$460 SRP†, (Reseller only) Annually *$1,470 SRP†. For freelancers and small shops scaling up for a big job that don’t need a full purchase commitment to then be stuck with unused ageing software, this is a really great model. For bigger studios and long run projects that lock to a single version of the software and don’t update for 5 years, this isn’t a great choice, since you will burn money on new features and software updates you won’t ever use.
Maya 2016 animation and deformation speed has had a huge boost with the new multi-threaded “parallel evaluation mode” and GPU speed boost. This means that for many animators and TDs getting character rigs running above 24ps during playback is now possible. This is a big change as last year I reported that 3ds Max animation speed was back up to a useable framerate and Maya had dropped down to a slow crawl.
3ds Max 2016 focuses on a new node-based, visual programing environment (similar concept to the ICE system in the now sunset Softimage) called the Max Creation Graph, or MCG. This allows users to create complex tools and modifiers for modeling (and animation as of the extension 1 release) that no longer require a programmer's time and compiled plugins.
MotionBuilder 2016 has finally gotten the software back in development and the team has taken a big step to get ready for future improvements. There are core improvements to working with the Story non-linear editor tool but read on to see why this is a must upgrade.
Mudbox 2016 hit the improvement slump this year, while there was a big push to integrate the sculpting engine into Maya. There were some uv editing and some brush updates, like a long needed “relax” brush to balance topology density and better controls for fall off. Of interest is the added Multi-touch gesture support on tablets that are equipped with N-trig technology like the Surface Pro 3… though this really is nothing that will make people switch from existing tools and workflows.
Maya Indepth
The big push for 2016 was getting Maya running faster - the dependency graph, the core of Maya is now threaded, giving a boost in performance across the application. For animation and rigging, this removes a big bottleneck in the deformation pipeline that was stuck on a single CPU and by multithreading it, speeds up skinning and overall animated rig playback. Depending on your hardware, Maya now can push more data onto the GPU to speed up things significantly. What might have been a 5 fps playback will likely be in the 20 to 30 fps for a game rig.
Mocap HIK editing doesn't yet work with Parallel evaluation. But I have seen improvements in speed with animation curve playback, making working with dense data and even with several characters skeletons possible at real-time playback.
This isn’t a magic fix. Although, there are still limitations with tools like follicles (though nDynamics are supported in parallel in the Extension 1 of Maya 2016) and using influence objects with verts that don't run in parallel, at least there are resources to help you learn how to speed up your Maya rigs even more. Check out Blazing fast character rigs with Maya 2016 for tips and tricks on this.
Speed:
“The Evaluation Manager is a new parallel evaluation system that helps increase the speed of both playback and manipulation of character rigs. The new system is multithreaded to take advantage of the computing resources available (cores and graphics processors). Previous versions of Maya included only a single evaluation system (DG mode).
Select from 3 new evaluation modes in the Evaluation section of the Animation (Settings) preferences:
- Parallel mode uses the Evaluation Manager to perform parallel evaluation across all available cores.
- Serial mode uses the Evaluation Manager, but limits evaluation to a single core (serial evaluation) and is used to troubleshoot correctness issues.
- GPU Override is a mode that works with the Evaluation Manager to accelerate deformations if either Serial or Parallel modes are selected. GPU override works with Viewport 2.0.”
UI:
The UI got a big update with a new really nice hotkey editor, which allows easier saving, sharing and assigning of hotkeys in Maya.

Maya now has support for High resolution displays like Ultra HD or 4K monitors and better font handling, along with cleaned up menu sets to better organize tools and make it easier for newer users to start working in the software.
Overall improvements to docking the UI windows makes it fast to layout the workspace, and the seemingly simple changes makes the software feel more intuitive and puts the user in control.
The negative of this is the overall grey blue coloring being used now is not contrasting enough, personally, and has made it harder to quickly look and find tools. The worst place for this is on the viewport icons to toggle xray, wireframe on shaded and xray bones, for example, but it is hard to tell how long this will take to get used to for existing vs. new users.
Menu icons now show up next to the tools in many areas of the UI for a nice added detail. However, I don't like that the blue, light grey and purple all blend together - the low contrast slows down how fast I can find what I am looking for.

Modeling:
Maya modeling has improved drastically over the past few versions and the team has finally fully integrated the modeling toolkit into the standard workflow of tools like Move, Rotate, Scale and pre-selection highlighting.
They then tackled taking the brush and sculpting engine from Mudbox and pulled it in to allow for much better sculpting tools to go with an improved Blend Shape Editor.
“Artists can now shape models more artistically and intuitively using a new set of fully-featured sculpting tools. Simply select a tool from the new Sculpting shelf, adjust the sculpting tool settings, and move your cursor across a model to make a stroke. Updates to the Blend Shape Editor make creating and editing blend shape targets easier. Click new buttons in the editor and on the Sculpting shelf to create, edit, and remove blend shape targets without adding new meshes to the scene.”
The edits are stored as simple deltas from the source mesh, creating smaller and more efficient Maya files and allowing for easier updates to existing targets without having to first track down the source shapes geometry.

For doing quick shape work and fixes for blendShapes the additionally hotkeys and better surface controls for aligning pivots and constraining to the surface make it really smooth to work on volume fixes.
New hotkeys let you pull components in (Ctrl +  -drag left) and push components out (Ctrl + -drag right) along their normals using the Move tool.
Speaking of pivots, Maya 2016 has a big update in control over the pivot. Pivot Quick align hot keys with D and (Ctrl, Shift, Ctrl + Shift) let you adjust pivot orientation, position, and alignment.
A common problem in the past was getting geometry that was “frozen” to world space where we still want to have its pivot align to the geometry. This was a few-step process and hacky.
Now you can simply hold D and Ctrl to set the custom axis to aim at the face of the mesh to orient it and then use the new Modify Bake Pivot Orientation to take the custom axis orientation and bake it to the selected object's transform, giving you rotation values vs. frozen geometry.
Rigging:
While the animation and rigging boost from parallel processing and deformers is a great bonus, there were some nice improvements in the deformation areas, including a new Delta Mush deformer to help smooth out deformation artifacts. The Delta Mush deformer was made popular when a demo of it was shared from Rhythm and Hues and it is a nice addition to the deformation arsenal. It does a great job of helping average out stretching and balancing the weighting on areas that are hard with only smooth skinning...like shoulders and hips and even the face.
 Delta Mush deformers won’t help game developers at the moment unless you use a custom tool to convert the smoothing over to joint helper bones and bake it back down to a regular skin cluster, exportable by FBX to your engine.
There are some other handy features like the “Playback auto hide in layers” feature that allows animators to turn on or off an automatic hiding of controls during playback. It can speed up the display a small amount but it also makes it nice to focus on just the character posing without all the visual clutter of the controls. There were various ways to manage this in the past but it is nice to have it streamlined into an existing tool and default out of the box.
Nothing new in solvers - HIK is still broken for doing any kind of advanced rigging with it, like reparenting the controls for better keyframe interpolation. This is a big fail for me but I don’t know how many others know you can even do this so it won’t make trouble for 99% of the users doing quick motion-capture edits. Retargeting also has limitations due to the missing HIK retarget settings that are available in MotionBuilder but don't seem to be exposed in Maya.
They did fix a long-standing issue with the Spline IK solver and its advanced twist setting, now allowing any joint axis to aim down a joint chain, not only the x axis. But there haven’t been any fixes to the Spring IK, or added control over the standard IK solvers for things like Stretch, Soft no-pop controls or other updates that most rigs require. I hope this gets addressed in a future version soon since we are due to have solvers that aren’t 15 years old.
MotionBuilder is Alive
As a long time MotionBuilder user and tester I had given up on seeing any improvements after the disappointing development done in the 2015 release.
Thankfully, the 2016 version has a few more things going for it and at least one must have for upgrading. The number one reason to upgrade this year is the 64bit file I/O improvements that let users export FBX files of size up to 2 GB. Dealing with large amounts of characters, big pose sets for the character and long edits, users hit file size limits and then lost work. Now there is some breathing room.

The story workflow has nice alignment updates for managing clips, including aligning them to each other, to the current time and also expanding them to fill in areas. This all had to be done before with some work by the animator, and is a welcome workflow speed up.
Another great update is the “Make All Clips Read-Only” from the right-click menu. It is really nice for animators working on large cinematic layouts or a game animator who is creating many blend and cycle edits that want to quickly export out all the clips to separate FBX files.
MotionBuilder is now smart enough to see that the duplicated clips are the same motion and will only write out a single FBX file, making for smaller file sizes, easier to update edits and less memory overhead when working on big scenes.
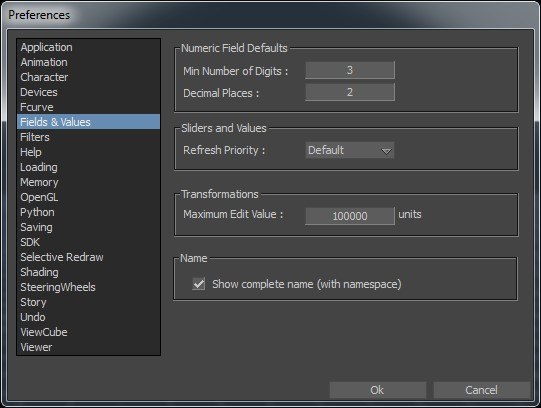
For many animators working on large layouts with big translations, it is exciting that now you can view and edit keys in the Fcurve editor with transformation values up to 1,000,000.
You can find and read the indepth release notes from Autodesk.

3ds Max Gets Yoga-Like Flexibility
3ds Max 2016 has taken the flexibility of modifiers and custom scripts, combined them with a new node based visual programming interface and created the Max Creation Graph or MCG. MCG is not a port or the same as Softimage ICE it is similar in concept but don’t expect the speed to be there yet, it is a version 1 release.
“Users can choose from several hundred different node types (operators) that can be connected together to create new tools and visual effects. What's more, users have the ability to create new node types by saving graphs called Compounds. The new tools that users create can be easily packaged and shared with other users, helping them expand their toolset.”
This new visual programing tool provides a huge boost in creative control for making more procedural tools that really don’t require deep understanding of programing to create, even though it will help. If you are unsure where to start, there is a very active Facebook community has already grown around building and sharing MCG tools you can find here: MCG Facebook page.
In the first release, animation controllers were missing. But as of the new Extension 1 Max 2016 release, users can now create custom constraints and more complex animation effects with the MCG.
Other nice areas of improvement are OpenSubdiv support. OpenSubdiv libraries open-sourced by Pixar that were added to Maya also making clean production geometry easier to move between the two softwares.
Alembic, another open-source data exchange format, has been added, making complex massive geometry or animated characters easier to share and GPU accelerated so working on film-level assets in both Maya and Max without having to export out FBX data is now possible out of the box.

XRef gets new life, the last area I will mention, is a big deal for teams using Max. XRef in Max hasn’t been as useful as the file referencing system in Maya for many reasons, but the difficulty and limitations of it kept it from being production ready.
As a first pass Autodesk added new support for non-destructive animation workflows in XRef, as users can now externally load files and objects into a master scene and animate them or edit material on the XRef object without having to merge them first.
Still, this isn’t as fully featured as the Maya reference system, lacking control over the reference edits. But it is a huge improvement over the past system and should allow for much better collaboration on files without having to manage updates by hand.
There are many other improvements to the overall work environment through the use of a new New Template System to create a shareable, standardized start-up configuration with settings for rendering, environments, lighting, and units for keeping all the project settings unified among a team. Max has always had an easy to configure UI and the new templates will make it even better to keep artists from creating something in the wrong unit setup or if artists are shared between projects with different settings. I know I wish I had this when I was on three different games that had different units and settings.
Final Thoughts
With the across-the-board large feature updates in Maya and Max, mixed with the tremendous amount of tweaks and updates to streamline and simplify artist workflows, and larger file handling for MotionBuilder, it is easy to recommend the upgrade, the first time in several version I have felt this way honestly, as anyone who has read my last reviews will know.
Details:
Ultimate Suite
Includes:
Autodesk® Maya® and Autodesk® 3ds Max®
Autodesk® MotionBuilder®
Autodesk® Mudbox®
Autodesk® Sketchbook® Designer
You can get the trial versions for all the software here:
http://www.autodesk.com/suites/entertainment-creation-suite/free-trial
--
![]() Brad Clark is a Mentor and co-founder at RiggingDojo.com -Teaching the art and science of character rigging. He can be also be found on Twitter @Bclark_Cgchar
Brad Clark is a Mentor and co-founder at RiggingDojo.com -Teaching the art and science of character rigging. He can be also be found on Twitter @Bclark_Cgchar


