In this last excerpt from Learning Maya 7 | Foundation by Marc-AndrGuindon and Cathy McGinnis, we conclude a two-part series on set-up and animation.

In this final lesson from Learning Maya 7, you will learn how to freeze transformations, sculpt surfaces by painting with Artisan, use different brush operations, create blend shapes, add custom attributes, create locators and use Set Driven Keys.
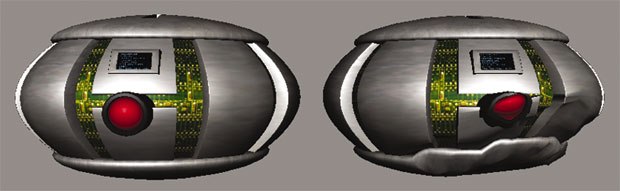
Sculpting the Orb
You will now use the Artisan Sculpt Tool to create a crashed looking orb. You will first group and duplicate the orb in order to have two copies to use later for the blend shape deformer. Feel free to use your previously saved orb or continue with 10-texturedOrb.ma.
1. Before starting the orb set up It is recommended to establish a good scaling for the orb and freeze its transformations before establishing a final set up. Since the modeling and texturing construction history is no longer required, make sure to also delete all the history.
-
Select all the orb geometry.
-
Press Ctrl+g to group it together.
-
Rename the group orbGroup.
-
Scale the orbGroup to 0.4 in all directions.
- Still with the orbGroup selected, select Modify > Freeze Transformations.
When freezing transformations, all the translation, rotation and scaling attributes for the selected nodes and their children are frozen and set to their default values.
- Select Edit > Delete All by Type > History.
Note: If you wait too long before deleting unwanted construction history, you might eventually get stuck with it, which will slow down your scene. Since the blend shape deformer will be part of the construction history, deleting the history after this point will also get rid of the deformer.
2. Duplicate the orb Later in this lesson, you will be using the blend shape deformer, which will require one untouched orb and another one to deform.
-
Select the group orbGroup.
-
Press Ctrl+d to Duplicate the orb.
-
Move the second orbGroup next to the original one.
- Rename the new orbGroup to orbCrashGroup.
3. Sculpt the orb You will use Artisan to paint and deform the selected geometry. Since the orb is made of multiple objects, you must select the orbCrashGroup before entering the Sculpt Tool.
-
With the orbCrashGroup selected, select Edit Polygons > Sculpt Polygons Tool >
 .
. -
Click on the Reset Tool button to make sure that you are starting with Artisans default settings.
-
Set the following attributes:
Under Brush:
Radius (U) to 0.2.
Under Sculpt Parameters, set the following: Operation to Pull; Reference Vector to Y-axis; Max Displacement to 0.1.
Note: In the previous test sphere example, you were painting using the normals of the surface as the direction to be pushed and pulled. In this case, you will pull along the Y-axis, which will move the vertices up.
-
- Paint directly on the model to get a shape similar to the following:
Blend Shape Deformer
In the next lesson, you will animate the orb colliding with the ground. To make it more realistic, you will need a deformer that will blend between the original orb geometry and the crashed one. That kind of deformer is called blend shape. Blend shapes are very useful in 3D, especially to animate facial expressions on characters, but for this project, blend shapes will be used to deform the orb.
1. Creating the deformer
-
Select the orbCrashGroup, then Shift-select the orbGroup.
-
It is important to select the original object last.
-
From the Animation menu set, select Deform > Create Blend Shape >
. -
In the Blend Shape Options window, make sure to set Origin to Local.
- Click the Create button.
2. Testing the deformer
-
Select any piece of geometry on the original orb. In the Channel Box, you should see a blendShape1 node in its construction history.
- Click on the blendShape1 node to make it active.
Notice the orbCrashGroup attribute. It will control the blending of the orbs shape between the original and crashed one.
-
Click on the orbCrashGroup attributes name to make it active.
- MMB click+drag from left to right to invoke the virtual slider and see the effect of the deformer on the geometry.
3. Tweaking the blend shape Since construction history still links the blend shape with the deformed surface, you can still tweak the orbCrashGroup geometry.
- Make modifications on the orbCrashGroup geometry with the Artisan Sculpting Tool.
Tip: Make your changes on the orbCrashGroup and not on the original orb.
4. Delete targets
-
Select the orbCrashGroup.
- Press Backspace or Delete to dispose of the second orb.
Note: When you delete blend shape targets, Maya keeps the blend values in the blend shape node instead of using the geometry in the scene.

Animation Set Up
The only thing missing before you can begin animating is a proper hierarchy for the intended animation. Since the orb will fly in your scene using a motion path, you will need a node only for that purpose. You will also need another node to keyframe the floating of the orb. Lastly, you will add custom attributes and connections to simplify your keyframing task.
1. Making a proper hierarchy
- Create a locator by selecting Create > Locator.
A locator is similar to a group, but it has a visual representation that does not render.
-
Rename the locator pathLocator.
-
Create another locator and rename it animLocator.
-
Select animLocator, Shift-select the pathLocator and press p to parent them together.
- Parent the orbGroup to the animLocator.
Note: The last selected object will become the parent of the hierarchy.

2. Add a custom attribute Since the blend shape attribute is hidden in the setup, you will add and connect an attribute for it on the animLocator.
-
Select the animLocator.
- Select Modify > Add Attribute.
This will open the Add Attribute option window.
-
Enter crashShape as the new Attribute Name.
- Make sure the Keyable checkbox is turned On.
A keyable attribute means that it will be displayed in the Channel Box.
-
Make sure the Data Type is set to Float.
-
In the Numeric Attribute Properties, set the following:
Minimum to 0;Maximum to 1;Default to 0.
Press the OK button to add the attribute.
Notice the new crashShape attribute is now displayed in the Channel Box when animLocator is selected.

3. Connecting attributes
-
Select Window > General Editors > Connection Editor.
-
Select the animLocator and click on the Reload Left button.
-
Select any geometry object of the orb, then highlight the blendShape1 node in the Channel Box.
-
Click on the Reload Right button.
-
On the left side, scroll down to our custom Crash Shape attribute.
-
Click on the Crash Shape attribute to select it.
-
On the right side, find and expand the Weight attribute to reveal the orbCrashGroup attribute.
-
Click on the orbCrashGroup to make the connection between the two attributes.
- Test the Crash Shape attribute on the animLocator.
Set Driven Keys
The logic behind Set Driven Keys is that one attribute (the driver) drives another attribute (the driven) based on manually set keyframes.
A typical example would be an Open custom attribute, which would drive the rotation of a door. You would only need to keyframe the door closed when the Open attribute is at zero, and set a second keyframe where the door is opened when the Open attribute is set to one.
It would be nice to have a custom attribute to control the lens of the orb to go in and out rather than keyframing both the tube and the lens objects manually. Set Driven Keys can be used for that purpose.

1. Add a second custom attribute
-
Select the animLocator.
-
Select Modify > Add Attribute.
-
Set the following:
Attribute Name to lensControl;Keyable to On;Data Type to Float;Minimum to 0;Maximum to 1;Default to 0.
Press the OK button to add the new attribute.
2. Define the driven keys
- From the Animation menu set, select Animate > Set > Driven Key > Set > .
The Set Driven Key window is displayed.
- Select the animLocator and click on the Load Driver button.
The animLocator object and its keyable attributes are displayed in the Driver section.
-
Highlight the lensControl attribute to specify it as the driver.
- Select the lens and tube objects and click on the Load Driven button.
Both objects are displayed in the Driven section.
-
Click+drag to highlight lens and tube objects in the Driven section to display their common attributes.
- Highlight all of the Translate attributes to specify them as Driven.
3. Set the driven keys
-
Make sure the lensControl attribute is set to 0.
- Press the Key button.
This will define the current position of the lens and tube objects as the wanted position when the lensControl is at 0.
-
Set the lensControl attribute to 1.
-
Translate the lens and tube objects together toward the inside of the orb.
-
Press the Key button to set the second driven key.
-
Test the lensControl attribute to see if it affects the lens and tube as desired.
- Press the Close button.
4. Save your work
- Save this scene as 12-orbSetup.ma.
Conclusion
You are now more familiar with the very useful blend shape deformer as well as the Artisan Sculpting Tool. You also learned about locators, custom attributes, connections and Set Driven Keys, which are essential to understanding any basic animation setup.
Find out more about building an orb and other topics in Learning Maya 7 | Foundation by Marc-André Guindon and Cathy McGinnis: Alias|Learning Tools, 2005. 642 pages with illustrations and DVD. ISBN: 1-894893-74-3 ($69.95). Check back to VFXWorld frequently to read new excerpts.
Primary author Marc-André Guindon is the founder of Realities Studio, a Montreal-based production facility. An advanced user of both Maya and Alias MotionBuilder, Marc-André and Realities have partnered with Alias on several projects, including The Art of Maya, Learning Maya 6 | MEL Fundamentals and the series Learning Maya 7. He had developed plug-ins and tools for films and games, including the Outlaw Game series. He served as td on XXX: State of the Union, Scooby-Doo 2 and Dawn of the Dead.
Contributing author Cathy McGinnis is an Alias certified instructor teaching at the Media Design School in Auckland, New Zealand. Cathy was previously a technical product specialist for Alias, specializing in rendering in both Maya and mental ray for Maya. She has been a contributor to several Alias publications, including Learning Maya | Rendering and Learning Maya | Foundation.


