In the latest excerpt from Learning Maya 7 | Foundation, Marc-AndrGuindon and Cathy McGinnis conclude a three-part series on rendering.

In this lesson, you will set up materials and textures for the orb. You will explore the makeup of a typical shading network, including its material node and any texture maps.
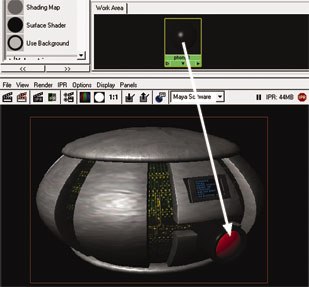
This lesson will make extensive use of the Interactive Photorealistic Renderer (IPR) found in Maya. This tool allows you to create a rendering of the scene that can then be used to interactively update changes to the scenes lighting and texturing. You will see how fast and intuitive it is to texture in Maya using IPR.
In this lesson, you will learn how to render a region; how to display snapshots; how to open and save your rendered images; how to display an images alpha channel; how to set up the IPR; how to make connections in the Hypershade; how to enable High Quality Rendering in a viewport. We pick up from where we left off at our last excerpt.
5. IPR and the Attribute Editor
-
Open the Attribute Editor.
- Click on an object in the IPR image and see the Attribute Editor update to show its shader.
6. Refresh the IPR image When you have models outside the IPR region, you can refresh the entire image without losing your selected region.

-
- To refresh the entire image, click on the Refresh the IPR Image button.
The entire image gets redrawn and your original region is maintained.
7. IPR lighting You can also use the IPR window to explore different lighting scenarios. By default when you dont have any lights in your scene, the IPR creates a directional light for you. Changing the light direction will cause the IPR to redraw accordingly.
-
Using the Outliner, select the defaultLight node.
- In the Perspective view, rotate the light to see the IPR update with the new lighting.
Note: You can also change the light color and intensity interactively.


8. IPR shadows
- Set the defaultLight Use Depth Map Shadows to On.
You will notice the IPR did update the render but the shadows did not appear.
- Select IPR > Update Shadow Maps.
Now the IPR updates and the shadows are visible.
Note: The defaultLight node gets deleted when you stop an IPR rendering. Interactive Shading.
1. Enabling High Quality Rendering
- In the Perspective view, make sure to press 5, 6 or 7.
High Quality Rendering is not available while in wireframe.
- Select Shading > High Quality Rendering.

Conclusion
The Maya IPR helps speed up the creative process and allows you to explore fast shading, lighting and texturing possibilities.
In the next lesson you will prepare the orb for animation.
Find out more about building an orb and other topics in


