|
|
||||||||
|
|
In Lesson 4 we drew thumbnails and developed
our visual research. In Lesson 5 we will follow through with the
animation process.
We begin by enlarging selected thumbnails to a
size we can use in our animation....Be sure to keep the drawings
"ruff"...full of action; spontaneous; full of life. TIP:
When enlarging thumbnails, check the
line of action...there is a tendency to lose the strong diagonals
which evolved during the thumbnail process...keep the spontaneity! Here we have
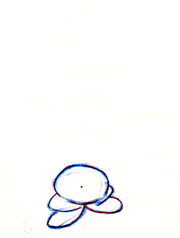
our character - Joey. We'll make him more...DETERMINED! Now that he
is more determined, let's put him into his starting position. We need to
be aware of the "staging" of the scene. Staging is the POSITION
in the FRAME which best communicates the CHARACTER and his ACTIONS
to the audience. We have to allow room in the frame (and in our
drawings) for Joey to ANTICIPATE down and then jump up to grab the
ring. Think of "staging" as used in the theater - every action must
be staged or framed so that the audience can follow along.
The feet motivate the action of the jump. Instead
of drawing out the entire character, SIMPLIFY. Draw only the feet,
legs and the ball shape of the character's body. Let's draw the first Key position... The next Key drawing or pose is the ANTICIPATION.
Notice the squash or weight shown in the body and legs. Now, let's draw the "stretch" drawing. This is
not a Key drawing, but a BREAKDOWN drawing. A breakdown drawing
comes between the keys to help the animator describe the action.
Note the downward drag in the feet as the character moves up. TIP:
Look for opportunities to use opposite
(opposing) actions. We follow with our next drawing as the character
drifts into the air. Now we'll ruff in the downward BREAKDOWN drawing.
Note the stretch of the body. TIP:
Again we use OPPOSITE ACTION. As he decends, the feet drag up. He lands on one foot first. TIP:
Squash the foot and show weight in the leg. As the other foot lands, we squash the body. He recovers, pushing with one foot. TIP:
By landing on one foot and pushing up on the other, we get what
is known as LEADING AND FOLLOWING ACTION. In the last drawing, Joey returns to an upright
position. Now that the feet, legs and body are completed,
we can go back and ruff in the arm positions on each drawing. Next,
we will draw in the heads...and finally, his facial expressions,
hair, clothes and other details. After all the keys and breakdown drawings are "ruffed
in", the next step will be to "pencil test" the drawings in order
to check the timing, action, weight, etc. Corrections are easy to
make to the ruff drawings. The final step will be to "in-between" the keys
and breakdowns...and then it's off to "clean-up"!! Be sure to check out Joey's pencil test in the animation section! All images
copyright © Larry Lauria, 1999 |